Flat frames illuminate where dust, vignetting, and other imperfections in the optical path and are used by imaging software can use the flat frame to compensate when processing the image. Flat frames are used with dark frames and bias frames to round out the calibration set. You don’t need to do any of these frames, but your images will come out better and less noisy if you do.
 If you disassemble your camera from your telescope, you will want to take flat frames each session because there is no guarantee the camera will have the same alignment when you reassemble it. If you don’t disassemble the optical path, then you can re-use your flat frames over multiple sessions.
You don’t need much equipment to take flat frames. You need a light source. You can use the Sun to take flat frames by pointing your scope to a clear part of the sky during the day (not at or near the Sun) and placing a clean, white t-shirt over the objective. The shirt, or any white cloth, will make an even, diffuse light. You don’t want any cloud or shadows over the objective. You can also buy a light source such as a lighted tracing tablet (search for “lite box tracer” to get you started) which provides even illumination over the telescope. You do need a source large enough to cover the entire objective. If you use a dew shield with light box panel, you can take flats anytime during an observing session, even after dark. If you are using a Starizona Hyperstar or other front mounted camera, the dew shield lets you but the light source over it. Once you have an even light source, follow these steps.
Loosen clutches and move (or slew) your mount to/near zenith.
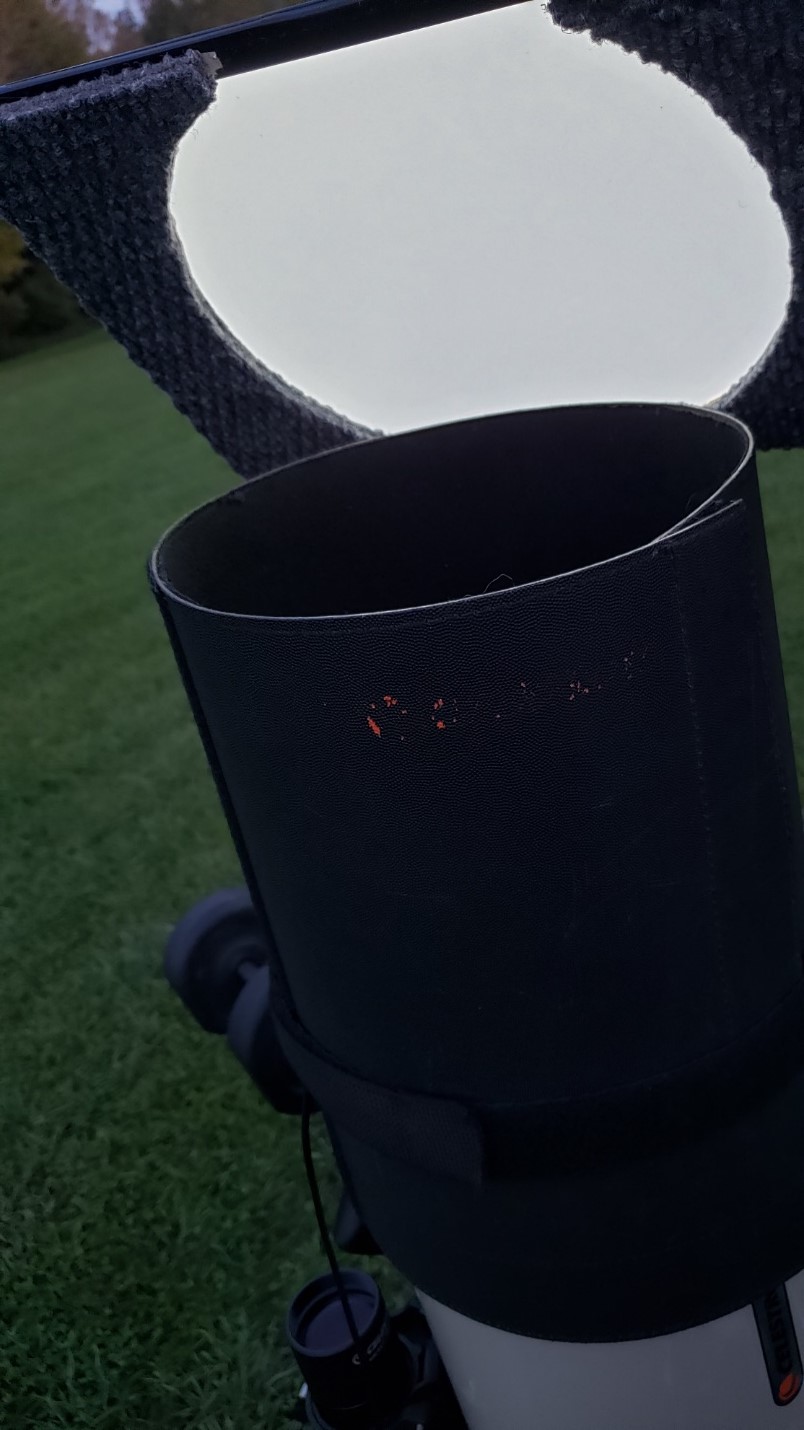
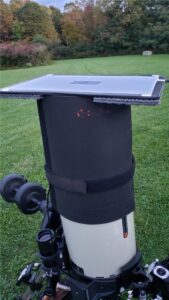
Set tablet upside down, directly onto the top of the dew shield.
Plug in USB power to onboard hub or any power bank, turn on to medium or higher brightness.
Remember to remove the tablet before slewing to another target!!! If you forget to do this, you won’t be able to see any targets or your brand new tablet will end up on the cement pad…in pieces.
You may have to “squeeze” the top of the dew shield a little smaller to fit the tablet snugly over top. I cut out “half-moon” circles in a couple of carpet squares and glued them onto the tablet. These help to shield stray white light from others nearby when I take ad-hoc flats in mid-session.
Connect your camera to Sharpcap (or whatever imaging software you use) in the usual way, and match your settings to these below, as close as possible. Your camera’s full size capture area will likely be different but be sure to set exposure and gain to AUTO to get an “OK” on your histogram. Unlike dark frames, we don’t have to match gain to use the same files over multiple settings. You do have to take flat files per sensor size, however. Then you can begin taking your flats.
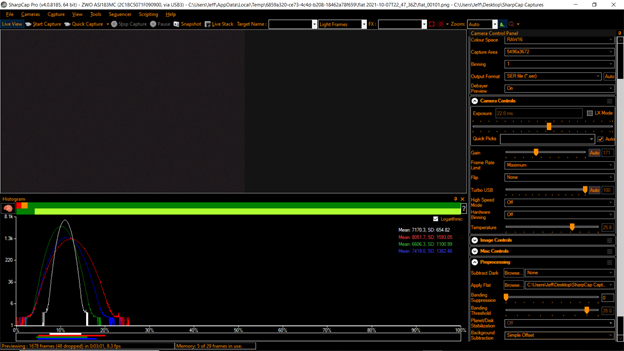
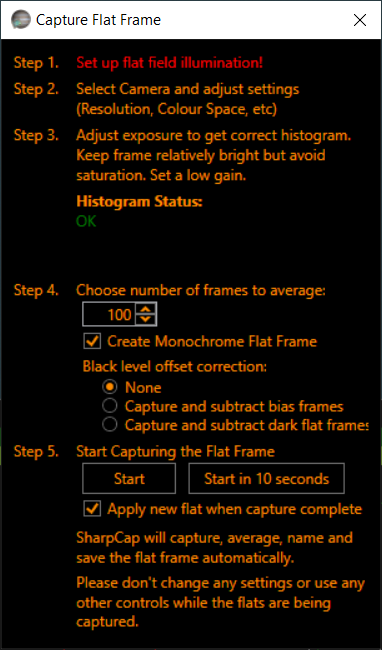
In SharpCap top menu, click Capture, then Capture Flats to see the menu below. Set your exposure and gain to AUTO to get a decent histogram right away. Be sure your Histogram Status says OK and put a check in “Create Monochrome Flat Frame” and another check in “Apply new flat when capture complete” if you want to use that flat right away. Otherwise, browse for it when you need it, and select it then.
After you’ve taken your 100 flats at your first Capture Area size, SharpCap will average all 100 of them and create a single file that you can select to use in preprocessing for live viewing or live stacking. SharpCap can automatically insert this file into the Preprocessing, Apply Flat, setting.
You’ll need to REPEAT the process for all capture area sizes you plan to use that night. I only use three sizes…full size, half-size, and 800×600 pixels. The whole process from unboxing the tablet, to packing it back up takes 6 minutes, which gives me 3 working flats for the night for one camera. If you have multiple camera, you’ll need flats for each camera.
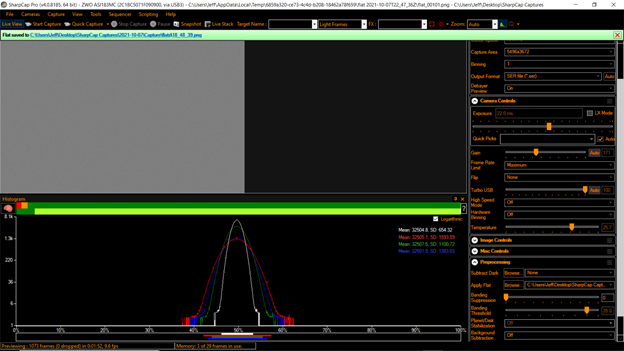
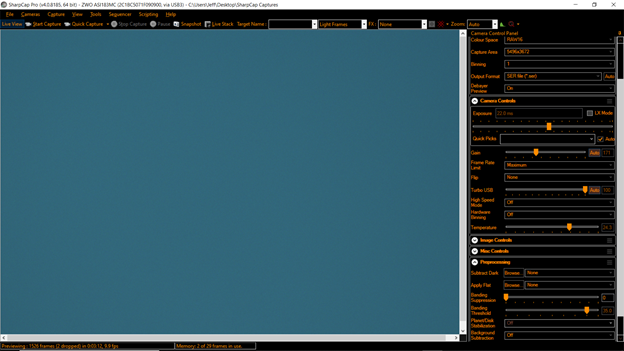
Common mistake: If you leave the Background Subtraction (near bottom of settings) set to anything other than NONE, your histogram will look like the next slide and you won’t have enough light to take your flats…regardless of exposure or gain settings!