
The best telescope in the world is relatively useless if you can’t find anything with it. Telescopes were traditionally equipped with a finder scope, which was nothing more than a small, wide field refractor scope with cross hairs. Finder scopes come in two styles. The first is the straight through variety which completely inverts the image up and down and left to right. You must turn your finder chart upside down to get properly oriented with this type of scope. On the plus side, you can site down the main scope tube, which facilitates initial aiming. Another school of amateurs prefer the right angle finder, which keeps the field in correct orientation. One negative is the small amount of light lost secondary to the extra reflections in the erecting prism. One additional option in these scopes is an LED illuminated reticule, which makes the crosshairs easier to see.
There are four common size finder scopes found either as original equipment, or as add-ons.
5×24, 6×30, 8×50, 9×60
The first number is the magnification and the second number is the aperture. The 5×24 does not have an achromatic objective, and is subject to chromatic aberration (color fringing). To combat this effect, there is a field stop (ring of plastic) midway down the inside of the finder which blocks half the light collected by the lens. It basically is no better than the unaided eye.
The other three finders provide at least a 5mm exit pupil to aid in utilizing the entire field of view. If possible, aim for a 50mm or larger finder. Also, look for a mount with six, rather than 3 adjustment screws. For easy storage, a dovetail mounting system is also nice.
The other style of finder is the unit or 1x finder scope. These are basically heads up display (HUD) units that project either a red dot, or series of circular reticules on an optical window, giving the appearance of the pattern being in the sky. All are used with both eyes open. The only disadvantage of these units as a group is the difficulty of use in light polluted skies.
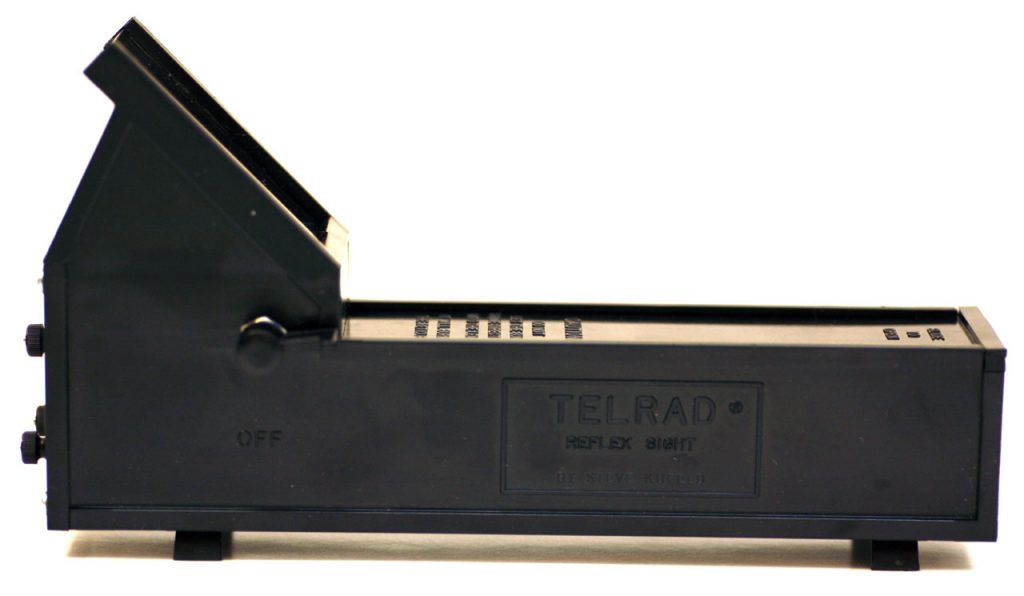
The oldest and most popular of the unit or 1x finder scope is the Telrad. This unit projects ½, 2, and 4 degree circles on the optical window. The advantage of the Telrad over the other units is the use of standard AA batteries and the fact that there are atlases dedicated to its reticule pattern. It’s only disadvantage is its weight of 11 ounces. The Telrad can be mounded on the telescope nearly flush or you can buy base extenders which lift the Telrad off the telescope body making sighting easier without impacting alignment.

The Rigel Quickfinder is the second popular unit. It weighs only 3.3 ounces and stands taller than the Telrad. It is excellent for small refractors and small catadioptric scopes as it does not affect the scope’s balance. It also has adjustable brightness, as does the Telrad. In addition it has a pulsar unit, which blinks the LED on and off , allowing easier visualization of dim objects.
The third unit power finder is the Orion E-Z Finder. This is another lightweight unit. It is a modified Daisy BB gun scope. It projects only a red dot and not a reticule. It is a little expensive in my opinion.
My recommendation? Telrad for main finder for beginners. Once you gain experience and start star-hopping, an 8×50 or 9×60.
Bio
Dr. Stuart Forster was a long-time member, former president, secretary, contributing author, scope builder, astrophotographer extraordinaire, host to several of the Messier Marathons that marked the beginning of the SAS observing year, multi-lecturer at past meetings and Summer Seminars, and a true amateur astronomer’s astronomer.